Perhaps you’ve been considering it for a while now, or perhaps the extra time at home has led you to thinking…what about starting an at-home compost? The list of benefits is supposedly miles long, but where does one begin? The good news is that everything you need to get started is already at your fingertips, and with just a small bit of setup, creating a compost using your home’s natural waste is easier than you may think.
Before you set to work, consider what projects or places around your home could stand to reap the benefits of composting. The most obvious is just outside your door. If you’re fortunate enough to have access to some green space, composting is the perfect parallel for your garden endeavors. Even those with sprawling estates may struggle to keep a garden growing because the soil beneath is simply not as supportive to plant growth as it could be. By adding humus, (the material that’s created in a compost), more nutrients and water become available within the soil. Happy soil, happy plants.
You might think it would be easier to simply pick up a bag of fertilizer at the local nursery, but you won’t quite receive the same results. When composting at home, you’re essentially mimicking the natural patterns of the earth’s soil — not unlike a tiny microbiological farm — but doing so as a supplement to the already existing soil. And even if you’re not so interested in the horticulture side of things, composting is still one of the easiest ways to cut down on the level of trash leaving your home each week. The less that ends up in a landfill, the better.
So you have the waste and you have the want to live your life a little greener. Where do you start?

Step One: Decide where you want your compost to be located.
If you have some of that coveted outdoor space, use an old trash bin, wooden box, or perhaps a selected portion of your garden, so long as it’s relatively dry and shaded. If you’re stuck inside, any countertop container will do, or maybe you have a local community garden to work with. You can purchase bins specifically designed for composting purposes, but really, any size or shape container will work just fine. Be sure that it has a tight-fitting lid to limit the potential odor. (You can also store it in the fridge to avoid attracting insects.)
Step Two: Make sure you know what items are okay to compost and which are not.
This is an extremely common mistake amongst first-time composters, and it may take a little while to learn which items are compostable and which are destined for the actual trash can.
Some items that are great to compost: scraps from fruits and vegetables, tea bags, coffee grounds, flowers, eggshells, hair, yard waste like grass clippings or leaves, old newspapers, etc.
Some items that are not-so-great to compost: bones, meat or fish products, oils, and butter, dairy products, food that has been cooked with oil, dairy, or meat, etc.
Note: While technically speaking these items can be composted, they won’t do much in the way of propelling your soil forward, and can actually attract unwanted pests or rodents.
Step Three: Create your layers of compost
Now before you toss everything into a bowl and call it a day, separate your items into “green” and “brown” materials.
“Green” materials tend to be wet in some fashion, like fruits or vegetables, while “brown” materials are dry, like newspapers, sawdust, toothpicks, or straw. The key is to try to maintain a healthy balance between green and brown so that enough moisture and oxygen can reach the growing soil.
Break up these materials into smaller parts to speed up the decomposition process. Add them to your bin in roughly equal layers, but don’t be afraid to change it up. If you find your compost getting to be too soggy, add more brown materials. Vice versa, if your bin appears dry or brittle, add more green items.
Step Four: Let the composting commence
The amount of time it will take for your compost to turn into suitable gardening soil depends on a handful of factors, like how large of a batch you’re making, the materials used, or the climate you’re located in. Many composting bins will be ready to go between two and six months. To spur the process along, you can turn or rotate the compost around once a week.
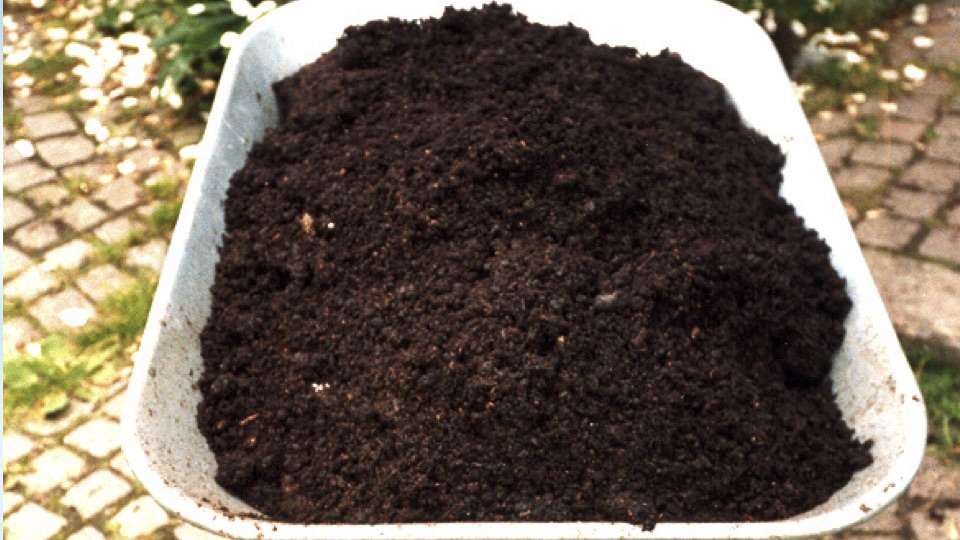
You’ll be able to tell when the compost is complete when the mixture has broken down fully and taken on a fluffy texture — the way nutritious soil should look! It will also smell quite a lot less like trash, and much more like clean, sweet, earth.
Step Five: Sow the soil and reap the benefits!
After your weeks of patience, put that fresh new soil to good use! Chances are you won’t have enough to fill every inch of your garden, but spread it particularly on spots that need a boost — or donate it to your local community garden!
-Allison Rapp
Photo: Compost in a wheelbarrow (SuSanA Secretariat via Wikimedia Commons)
0 comments on “Composting 101: A Guide for The Newbie Gardener”